
I'm liking this robin's egg blue. I'll probably paint the drawers a soft white and add blue knobs.
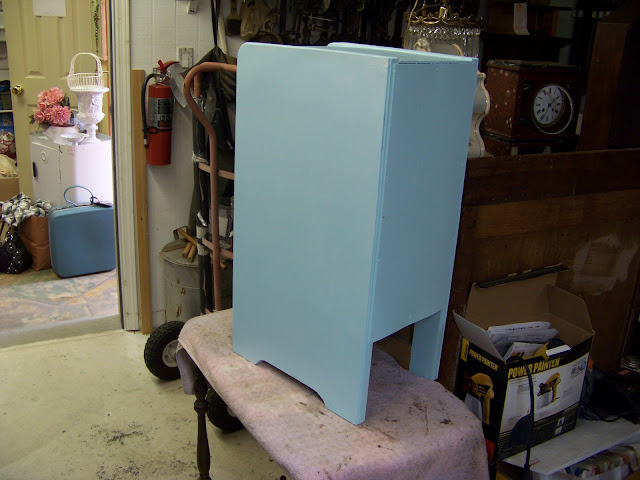
I kind of wanted to paint this pink. It was hard to decide.
See the power painter in the corner? I never use it. I can't figure out how to use it without using too much paint.
When I woke up this morning, I decided I didn't like the blue. But I went ahead and started distressing it, anyway. As I sanded and more of the white started peeping through, I started liking it again.
I like the pop of color inside the drawers.
When I was satisfied with how it looked, I applied 2 coats of poly.
Sorry this is a long post but this was a long project
Some of my pictures are out of sequence but I don't know how to get them lined up correctly. :)
I am linking to:
|


This is beautiful! I too am more of a pink sort of person. But when I saw the first picture of your vanity section done up in the robin's egg blue and white, I thought I must try those colors on something. I love it!
ReplyDeleteYour post also brought up another question I have. My husband hates me bringing home used items. He is very scared I am going to bring home roaches or some other pest. You noted in one picture that "the drawer on the right still shows evidence of roaches". So what is the evidence? And do you do anything special to furniture or other items to ensure your home is safe from any pests? I especially worry about the paper items I buy. (postcards, photographs, scrap books, and old books) Any advice?
Thanks,
Cheryl
Hi, In picture 4 if you look closely the picture on the right has "streaks". This is most likely bug urine. So what I do is give it a light sanding with my electric sander (I always work outside) and sand by hand the places my electric sander won't reach. This "skims" off the dirt and bug residue. If I see roach eggs I scrape them off. Then wash with a mild solution of bleach water. By the time it is painted I feel it is very clean. Also, whenever I bring a piece of furniture into my shop I always clean the underneath thoroughly then spray with bug spray. For paper goods you have to watch for silver fish. Look them over carefully outside and don't let papers pile up inside. Hope this helps.
ReplyDelete